
Canned beans are an easy, high-protein solution; however, cooking your own beans is a healthier, more cost-effective solution.
In an effort to reduce our carbon footprint, many of us cut our meat consumption in favour of plant-based dishes. Meatless Monday is now a common occurrence in many North American households, and countless others have adopted this philosophy wholeheartedly every day of the week.
But being a responsible and conscientious eater doesn’t stop with cutting out meat. There are little adjustments we can all make to reduce our impact even further. One big thing we can do is to cook our own beans rather than using the canned variety.
Beans are often a large part of a meatless (or less-meat) family’s diet, as they contain high levels of protein and are filling and satisfying. However, when we make the switch to beans in lieu of meat, it’s easy to just use canned beans, which are precooked and ready to go. Unfortunately, these cans are often lined with BPA, and pre-cooked, canned beans can contain unnecessary sodium. Further, each can you use had to be processed, filled, labelled, and finally recycled.
Although it’s not always convenient to cook your own beans (canned beans are great when you’re in a pinch), our health, the environment, and our wallets can all benefit. Plus, home cooked beans have a better taste and texture. Here’s how to do it:
- Choose organic beans from somewhere that sells a lot of beans (high turnover means they’ll likely be more fresh). Your local natural health food store is likely a sound option.
- Sort through beans and pick out any that look shriveled or blemished as well as any stones or pebbles that may not have been sifted out.
- Measure two cups of dried beans per five to six cups of cooked beans you require. (Extras can be frozen for future use, so don’t be afraid to make a big batch.)
- Cover beans with cool water, until water sits about two inches above the beans. Leave overnight to soak, or for at least six hours. (Note: lentils and split peas do not need to be soaked.)
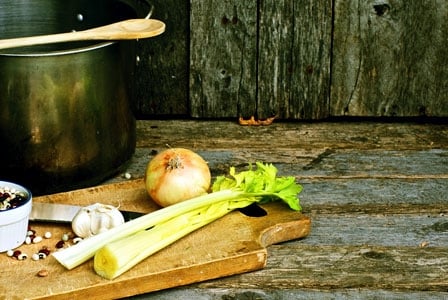
- Drain soaked beans, place in a large pot, and fill with water until two inches above the beans. Season beans with a variety of herbs, spices, and other flavouring agents such as thyme, bay leaf, oregano, garlic, celery, and carrots. And add a strip of kombu (seaweed), which helps make beans less gas-inducing.
- Bring beans to a boil, then turn down to a simmer with lid askew.
- Regularly skim the liquid surface of any foam that is created (this also helps to reduce beans’ gassiness.
- Cook beans until tender, but not mushy (this will take anywhere from one to two hours, so it’s important to keep an eye on them).
- Once beans are cooked, lightly salt them to bring out their natural flavour. Let beans sit in their cooking liquid to cool. Cooking liquid can be frozen for a tasty soup mix later on.
- Cooked beans can be stored in their liquid in the fridge for a few days, and in the freezer for a few weeks.


